
Hello there everyone!
Hope everyone's weekend is going well.
A few weeks ago I received some blogger mail and got some goodies from the brand Kiss. Ashleigh from my Twitter kindly sent me some goodies from this brand. I decided to try some things out.

*This post is not sponsored.
I was surprised by my how much products I received! So I'm grateful that I got sent these. I decided to try out these pretty french manicure style glue on nails! I was intrigued by these because I was curious as to how long these glue on nails would stay put on your nails. I put it to the test and wore them for a whole week!

Bur first, let me show you how I prepared my nails before putting them on. At the back of this packaging, it had easy to follow instructions as to how to put them on. So I followed the instructions and it was nothing complicated. Simple and easy to follow.


Firstly, I used some cotton pads and nail polish remover to remove any trace of polish on my nails to ensure the nails have a clear canvas for the false nails to adhere to. After that I grabbed my Burt's Bees Cuticle Cream just to soften my cuticles a little bit before using the manicure sticks to push them back.

Thereafter, I removed the packaging from the false nails and I had to decide which size I needed for each nail. Fortunately, all the nails have small numbers at the back of them printed very lightly and small. So I only had to choose five sizes and look for the same numbers for my other hand. I made sure they were neatly set out in order and ready for me to glue each nail on.

Very nice of them to also include the nail glue within this package because then I didn't have to go out and buy my own as I don't own any nail glue. After getting all the false nails together and prepping my own nails, I was ready to start gluing the false nails on.
This Nail Glue from Kiss is a brush applicator, kind of like nail polish applicators, which made the application so so easy! As per the instructions on the pack, I had to brush the glue on my natural nails and also the back of the false nails. Then I placed the nails on my natural nails and aligning it along my cuticles. Then press down the false nails for about 5 seconds.
And Voila! Simple and Easy!


I soon realised after applying the false nails that they were a little bit too long and I preferred a more square shape to my nails. So as another test, I trimmed them slightly and filed them down a little.
After cutting and filing the nails, they were still staying put on my nails and they were not hard to cut or file either. Below is how they look after I trimmed and reshaped them slightly.

This photo is below was taken during the week on a Tuesday morning on my way to work.

I love how these nails looked on me! The colour of the nails looks so natural and so flattering to your hands. I wore these nails for a week and I guess I felt a bit more glamorous than usual with these nails. They looked so elegant and clean. Love the look of them! Throughout the week they still stayed as clean and glossy as they were when I first put them on. On the packaging they note that the nails are Ultra Flexible, and it's true. They fit nicely on my nails and it felt really comfortable while I was wearing them. To me they also looked natural to.
You're probably wondering about the durability of the nails right?
On the first morning I had the nails, I by mistake grabbed something twice with my nails instead of my fingers which caused the 2 nails to come off. However, this is because I was not used to these long nails yet. I had the glue with me so I just glued them back on. Besides that little encounter on the first day, they lasted pretty well throughout the week. I'm actually very impressed by how they lasted on my nails. I have bathed with these nails, washed dishes, cleaned the house and they still lasted well. On Saturday morning another nail came off but only because I was putting my trainers on and squeezed my finger inside the trainer at the back to put my foot inside. But at this point, I was already impressed by these nails.
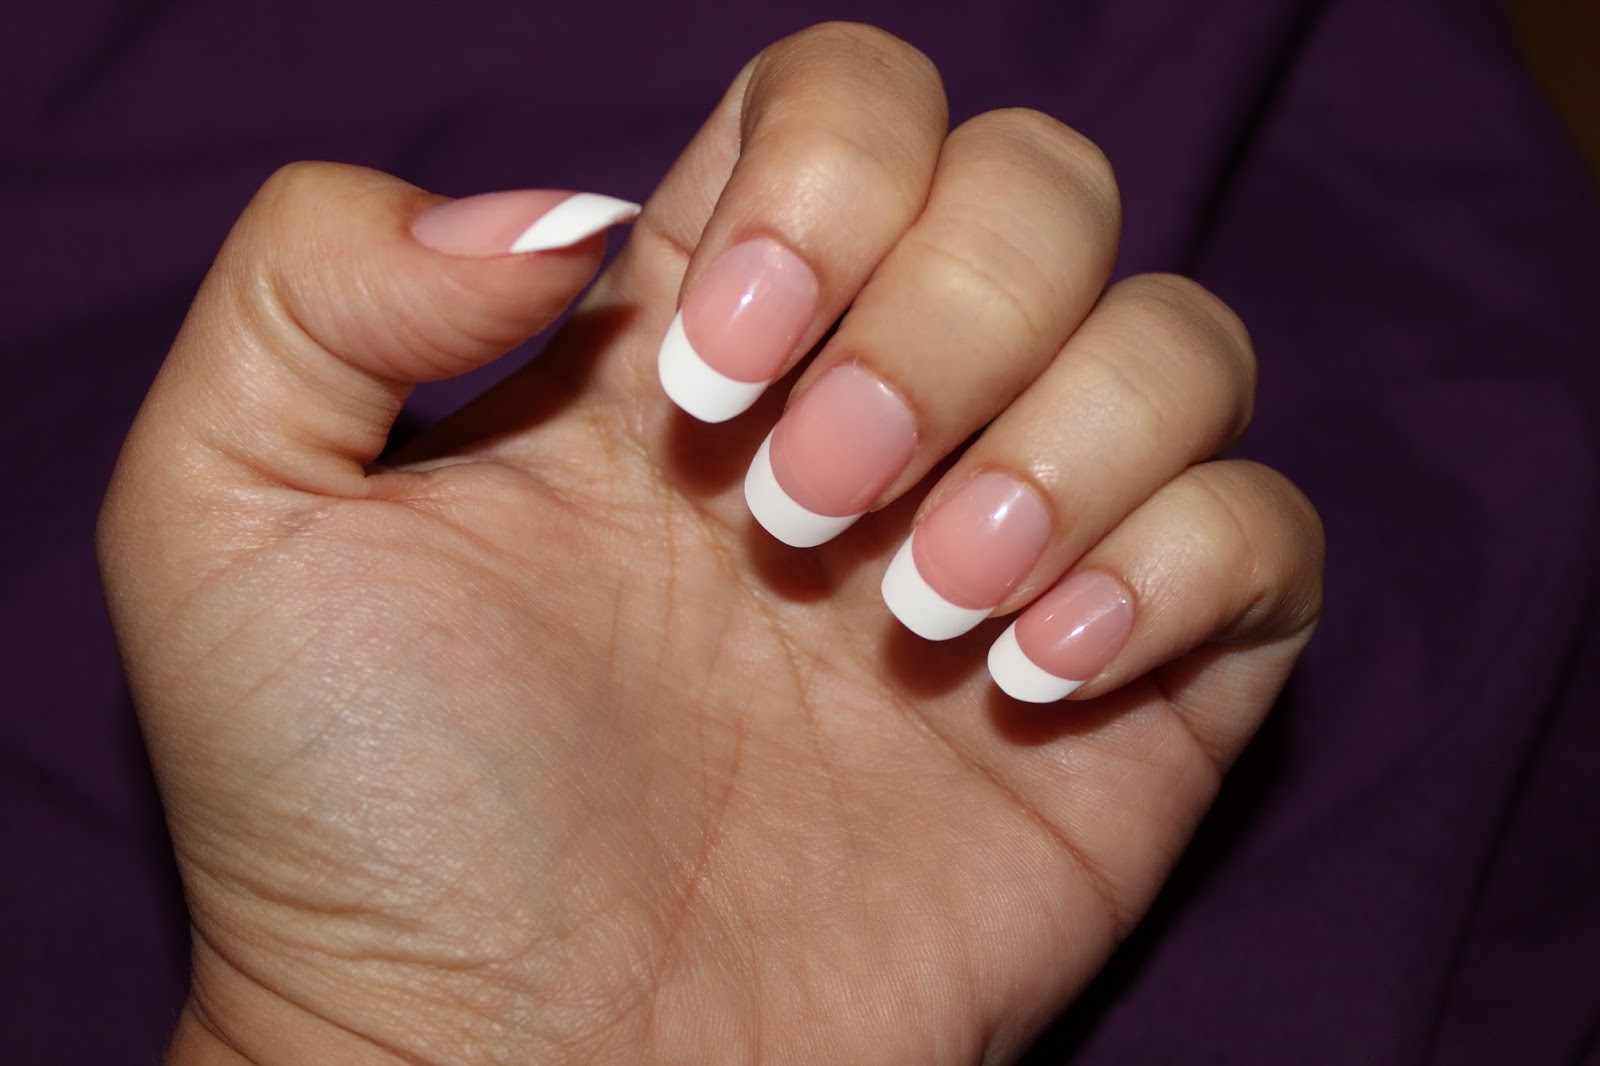
I applied these nails on a Sunday night. The photo below is how they look the next Sunday afternoon.


They still looked pretty decent a week later. I did start removing them that evening just to test the removal process. In the instructions, you are instructed to cut and file the nails to disrupt the surface. Then soak in Acetone nail polish remover. I tried this method with one nail as it was getting pretty late that evening so I didn't have time to do them all at one time. After soaking in the acetone, it starts to melt away and you are then able to wipe it further away with cotton pads. What makes it even better is that they don't leave any damage to your natural nails once they've been removed.
Overall, I have loved using these nails. It made my hands feel so feminine and pretty, I always caught myself looking at my own nails. It kind of gave the illusion that my fingers were thinner! As I said above, it definitely added a bit of glamour to my normal nails, which I enjoyed. I would definitely recommend these nails for you to try out!
Thank you once again to Ashleigh Dougherty for sending this package to me and giving me the chance to try this brand out.
I can only find these Oval shaped nails on the American Kiss website HERE . I can't find the name on the package of my set but according to that website, it looks like I have the set called Humble Pie.
However, you can buy other Kiss products from their UK website HERE or you can try your local BOOTS store or website.
Have you tried any product from KISS?
This is my first time trying out any product from this brand and I'm definitely left feeling impressed.
No comments:
Post a Comment